Perfectly shaped eyebrows can transform your look, frame your face, and enhance your natural beauty. While professional eyebrow shaping is a popular choice, learning to groom and shape your brows at home can save time and money. With the right tools, techniques, and patience, you can achieve salon-worthy eyebrows in the comfort of your home. Here are 10 must-know tips for shaping your eyebrows at home.
1. Identify Your Ideal Eyebrow Shape
Before you begin shaping, it’s important to determine the eyebrow shape that best suits your face. Eyebrow shapes are typically categorized as arched, rounded, flat, or angled. Consider your face shape when deciding:
- Round Face: Go for a high arch to add length to the face.
- Oval Face: Softly angled brows work best to complement the natural balance of an oval face.
- Square Face: A strong, defined brow with a slight curve can soften angular features.
- Heart-Shaped Face: Rounded or soft-angled brows balance the prominent forehead.
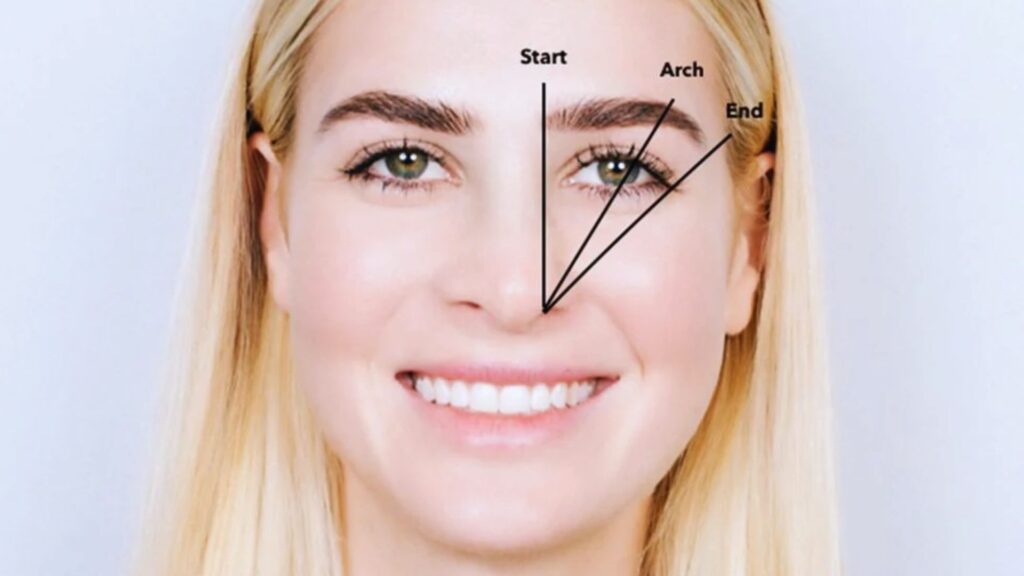
Pro Tip: Use a makeup brush or pencil to map out your brows. Line it up from the side of your nose to find the starting point, angle it through your iris for the arch, and align it with the outer corner of your eye for the end.
2. Gather the Right Tools
Having the proper tools is crucial for precise and effective eyebrow grooming. Here’s what you’ll need:
- Tweezers: Choose a pair with a slanted tip for better grip and precision.
- Small Scissors: Ideal for trimming long brow hairs.
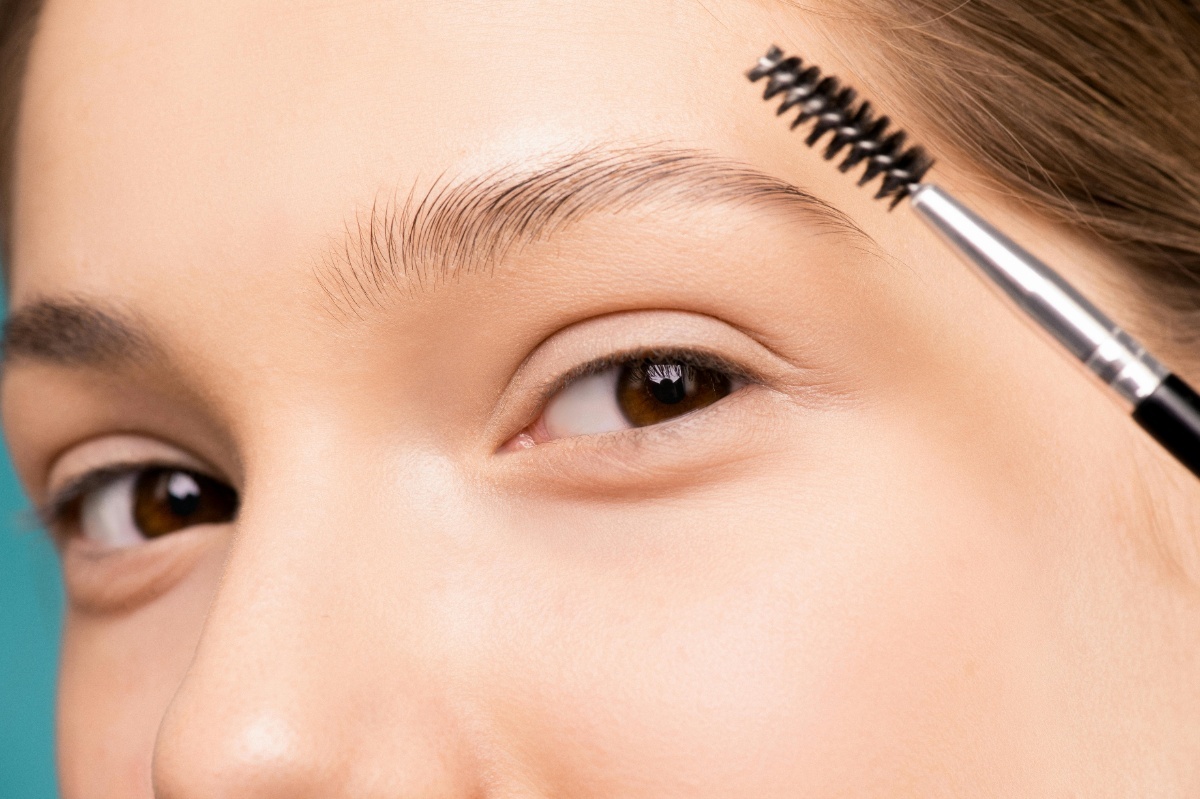
- Eyebrow Brush or Spoolie: Helps comb the brow hairs into place.
- Eyebrow Pencil or Powder: Useful for defining your shape and filling in sparse areas.
- Magnifying Mirror: Ensures you can see every detail.
- Thread or Wax (optional): This is for those who prefer these methods over tweezing.
Pro Tip: Invest in high-quality tools to make the process easier and more comfortable.
3. Start with Clean Brows
Before shaping, ensure your brows and surrounding skin are clean and free of makeup. Wash your face with a gentle cleanser, and use a cotton pad with micellar water if needed. Clean skin helps you see your natural brow shape and reduces the risk of irritation or infection.
Pro Tip: Exfoliate your brow area gently with a soft scrub to remove dead skin cells and prevent ingrown hairs.
4. Trim Excess Hair
Long or unruly brow hairs can make your eyebrows appear messy. Trimming them is a simple way to tidy up your brows without over-plucking. Here’s how:
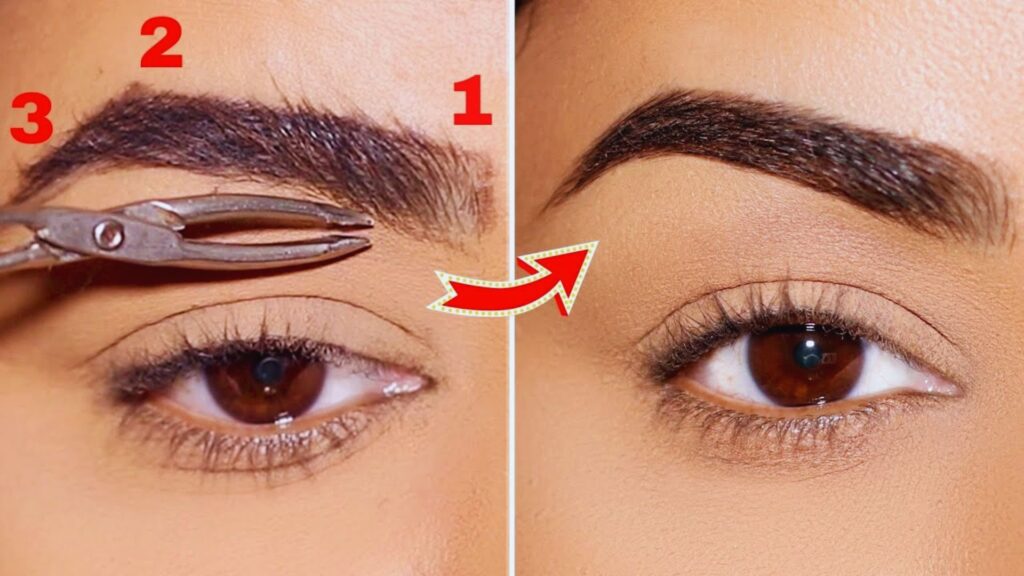
Brush your brow hairs upward using a spoolie.
Use small scissors to carefully trim any hairs that extend beyond the natural shape of your brow.
Pro Tip: Trim conservatively—better to trim too little than too much.
5. Tweeze with Precision
Tweezing is one of the most effective ways to shape your brows at home.
Follow these steps for the best results:
- Work in natural light to clearly see each hair.
- Tweeze stray hairs one at a time in the direction of hair growth to avoid breakage.
- Focus on removing hairs below the brow line to maintain a natural look.
- Avoid over-plucking, as sparse eyebrows are difficult to fix without makeup or professional help.
Pro Tip: To minimize pain, tweeze after a warm shower when pores are open.
6. Use a Brow Pencil to Define Your Shape
To avoid over-tweezing, outline your desired eyebrow shape with a brow pencil before removing any hairs. This acts as a guide, helping you maintain symmetry and shape. Fill in sparse areas lightly to see how your brows will look once shaped.
Pro Tip: Use light, feathery strokes to mimic natural brow hairs for a more realistic look.
7. Work on Symmetry
Perfectly symmetrical eyebrows can be challenging to achieve, but slight asymmetry is natural and adds character. However, you should aim for balance:
- Regularly step back from the mirror to assess both brows together.
- Use your brow pencil as a guide to measure and compare the height and shape of each brow.
Pro Tip: Don’t obsess over making your brows identical—remember, brows are sisters, not twins.
8. Avoid Over-Plucking
One of the biggest mistakes in eyebrow grooming is over-plucking. Removing too much hair can leave your brows looking thin and unnatural. To avoid this:
- Stick to removing only stray hairs outside your defined brow shape.
- Take breaks to step back and evaluate your progress.
Pro Tip: If you’re unsure, leave a few hairs rather than removing them. You can always tweeze them later, but growing them back takes time.
9. Soothe Your Skin Post-Shaping
Tweezing and trimming can cause minor irritation, redness, or discomfort. After shaping your brows, soothe the skin with a gentle aftercare routine:
- Apply a cold compress or ice pack to reduce redness.
- Use aloe vera gel or a soothing cream to calm the skin.
- Avoid applying makeup to the area for a few hours to prevent clogging pores.
Pro Tip: If your skin is sensitive, consider applying witch hazel as a natural toner to reduce inflammation.
10. Maintain Your Brows Regularly
Once you’ve shaped your brows, maintenance is key to keeping them looking polished. Check for stray hairs every few days and remove them as needed. Regular brushing and trimming can also help maintain a neat appearance.
Pro Tip: Set aside a specific time each week for brow maintenance to keep them in shape effortlessly.
Bonus Tips for Beautiful Arches
- Hydrate Your Brows: Apply a small amount of castor oil, coconut oil, or vitamin E to nourish your brows and promote hair growth.
- Highlight Your Brow Bone: Use a highlighter or concealer under your brow bone to define the shape and brighten your eyes.
- Choose the Right Brow Products: Invest in quality brow powders, gels, or pencils to fill in sparse areas and enhance your shape.
Conclusion
Shaping your eyebrows at home can be a rewarding and cost-effective way to enhance your look. With the right tools, techniques, and a little patience, you can achieve beautiful arches that frame your face and highlight your features. Remember to start slow, work with your natural brow shape, and avoid over-tweezing. By following these 10 must-know tips, you’ll master the art of eyebrow shaping and enjoy flawless brows without stepping out of your home.






Leave a Reply